Fiber craftTry one tiny project firstAt most one paid comparison
Beginner Embroidery Kits for Adults: Choose an Easy First Project
Start with the instruction format that makes the next stitch obvious. Try a tiny borrowed-supply session, decide whether you actually want another one, and only then diagnose the one gap a kit would need to solve.
A small, organized first project gives better evidence than a large “complete kit” promise.
Who this guide is for
Good fit
You want a quiet project that pauses easily and can live in one small supply pouch between sessions.
Main decision
Choose whether you would rather follow visible lines, practice stitches, or count a chart before comparing designs.
Skip for now
Wait if close handwork is uncomfortable, the design is too dense, or the kit provides no clear stitch and finishing instructions.
A beautiful design is not enough. For a first project, pattern clarity, organized floss, readable instructions, and a manageable number of stitch types matter more than decorative extras.
3 questions · 96 raw states · fail-closed
Find the smallest honest next step
No answer is preselected. A project path and real trial outcome are always required. A blocker appears only after a repeat-worthy attempt. Partial, stale, or incompatible answers never activate a paid link.
0 of 2 required answers complete. No paid links are active.
Next session
Boundary to keep
Try before you shop: three stitches on scrap fabric
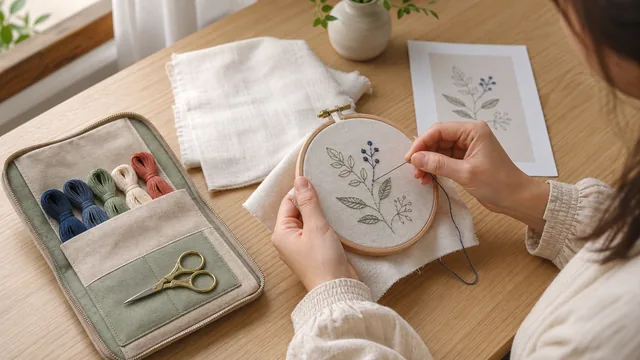
Borrow a hoop, embroidery needle, and a short length of floss. Use plain woven scrap fabric you can safely discard. Try two basic stitches and a tiny line or motif for 15 minutes before comparing any kit.
1
Thread and secure
Separate the floss only if your borrowed instructions call for it, thread the needle, and learn the recommended starting method.
2
Make short rows
Practice a running stitch and backstitch, then try one small filled area only if the motion still feels comfortable.
3
Pause and restart
Set the hoop down, return later, and see whether finding your place again feels easy. Repeatability matters more than a perfect sample.
A kit becomes relevant only when the trial proves it can remove a specific gap. The product still needs to state the pattern format, finished size, supplied colors and quantities, included needle or hoop, instruction format, and finishing method.
Decision table: choose the instruction style
These formats teach different habits. Pick the one that makes the next stitch obvious and gives you a realistic finished object.
Starter path
Good first finish
Must include
Commonly missing
Stamped surface embroidery
Small floral or geometric hoop
Printed fabric, hoop, needles, sorted floss, stitch guide, color key
A threader, finishing felt, mounting steps, and usable scissors
Stitch sampler
Reference sampler kept in its hoop
Clearly labeled practice areas, fabric, hoop, needles, floss, instructions for each stitch
A final display method and guidance for correcting mistakes
A hoop, thread organizer, backing, and a clear center-start method
Three formats the matcher can evaluate
The editorial order stays fixed. These are decision references, not three things to buy. A complete compatible result can generate no more than one paid comparison.
01 · Follow the lines
Stamped embroidery kit
Must state: printed-fabric removal method, finished size, supplied colors, included hoop and needles, stitch key, and finishing guidance.
Reject when: “complete” replaces a real parts list or the marks and finishing method stay unexplained.
02 · Learn the motions
Beginner stitch sampler
Must state: labeled practice areas, included fabric, hoop, needles and floss, plus readable needle-path instructions for every stitch.
Reject when: instructions are only decorative photos or correcting mistakes and displaying the sampler are unexplained.
03 · Follow a grid
Easy counted cross-stitch kit
Must state: fabric count, chart and key format, finished size, supplied floss quantity, needle, hoop status, and finishing steps.
Reject when: chart legibility, color completeness, or start position cannot be checked before ordering.
Your first session: organize, learn, finish a small area
Organize
Read the whole key first
Protect the table, identify the fabric direction and colors, count the needles, and place every sharp item in one visible container.
Learn
Practice off the main detail
Use a spare edge or practice area for the first few stitches. Check tension without pulling the fabric into puckers.
Finish
Complete one motif or row
Stop at a visible checkpoint, secure the thread using the kit's method, store the needle safely, and note the next color or chart position.
Recurring cost, safety, and storage
01
Recurring supplies
Hoops and some tools are reusable. New projects generally require fabric, floss, needles as they wear or get lost, a new pattern, and any backing or display material.
02
Safety and comfort
Store needles and scissors in a closed case, keep small parts away from children and pets, use good light, and pause when close handwork or repetitive motion becomes uncomfortable.
03
Storage footprint
A single project fits in a compact pouch if floss stays labeled and the needle has a secure case. Keep unfinished fabric clean, dry, and away from snagging surfaces.
Compare the wider hobby fit
If embroidery still feels too detailed, use these guides to compare other calm, compact, or screen-free starts.